
Merchant Dashboard features (payment links & transaction insights)
Kuma from KIRAPAY
The KIRAPAY Merchant Dashboard is your command centre for crypto payments. Everything you need — balances, transactions, payment links, analytics, API credentials, and settings — lives in one place, accessible from a clean sidebar navigation.
1. Dashboard Overview — Home
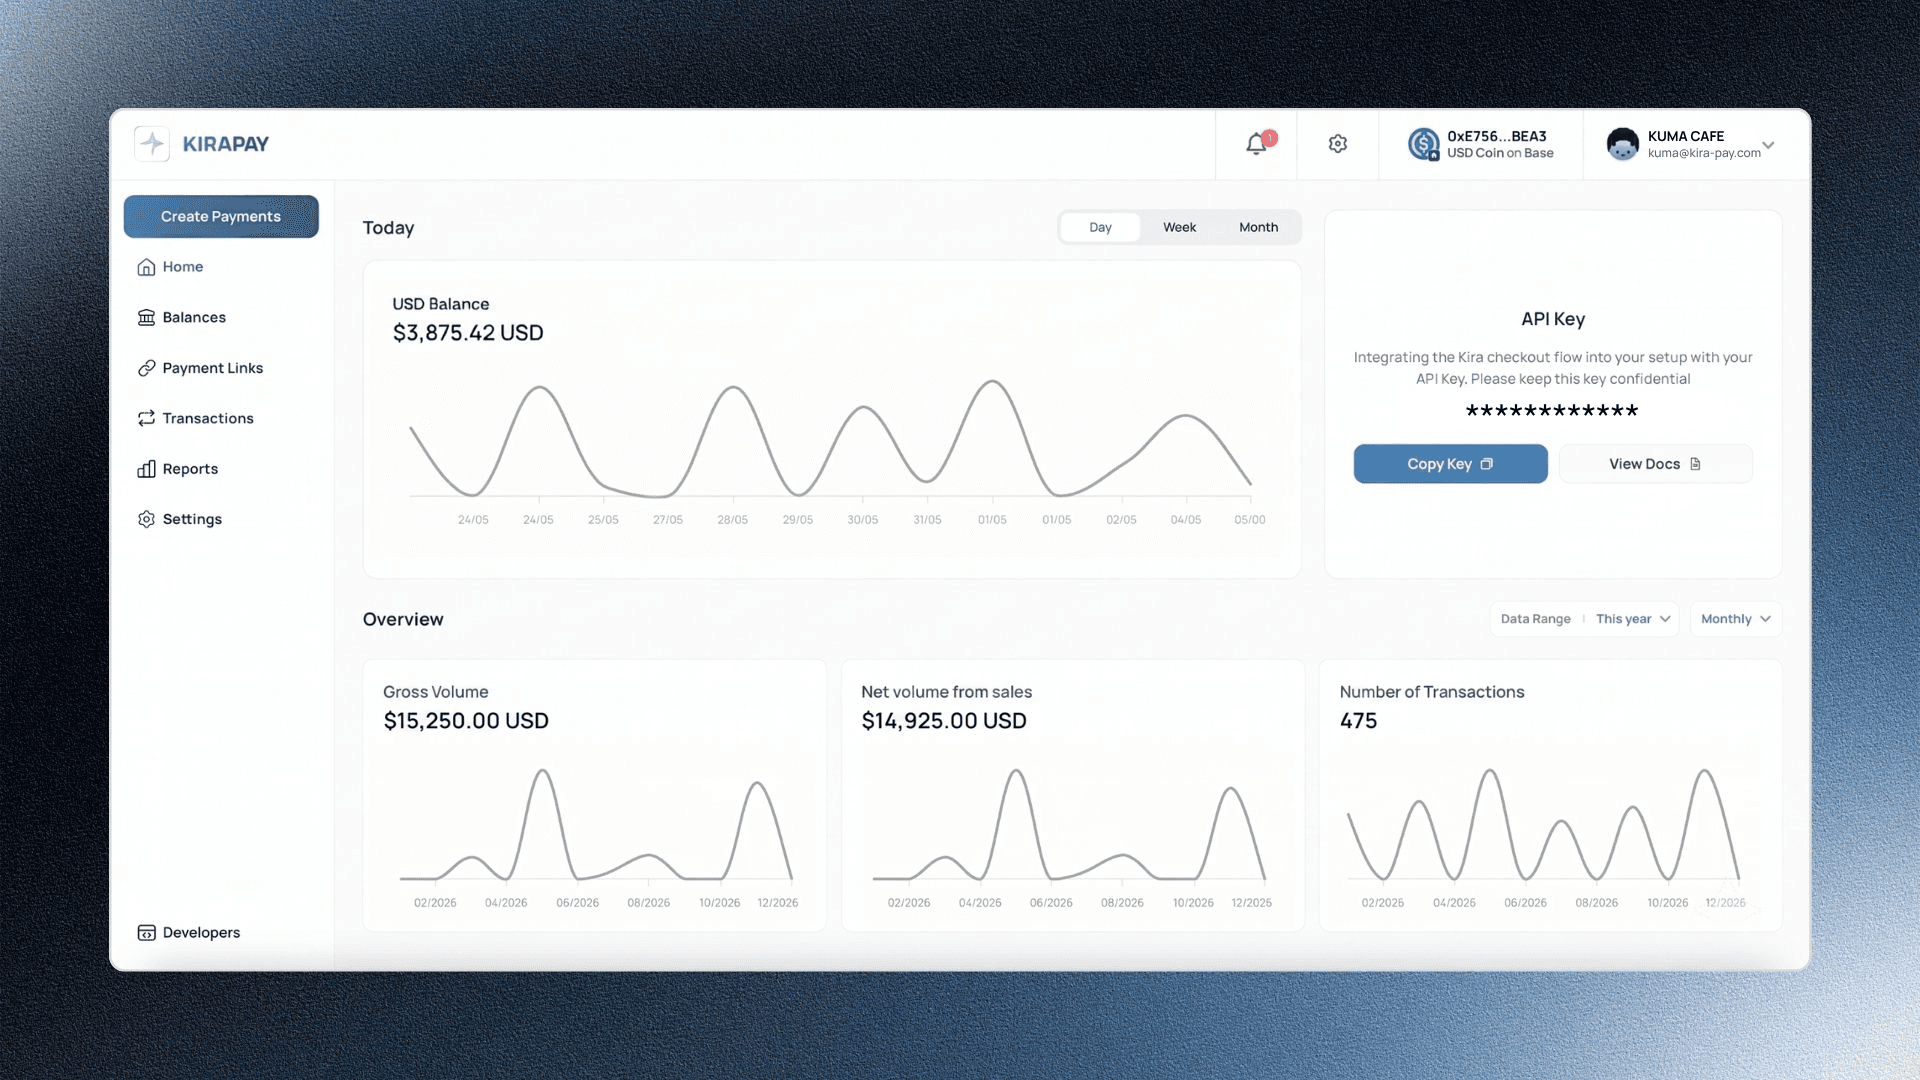
The home screen gives you a live snapshot of your merchant account at a glance:
💡 Settlement Token Indicator
The header bar shows your active settlement configuration — in the screenshot above, 'WBNB on BNB Smart Chain' — so you always know which token and chain your payments are routing to without navigating to Settings.
2. Balances
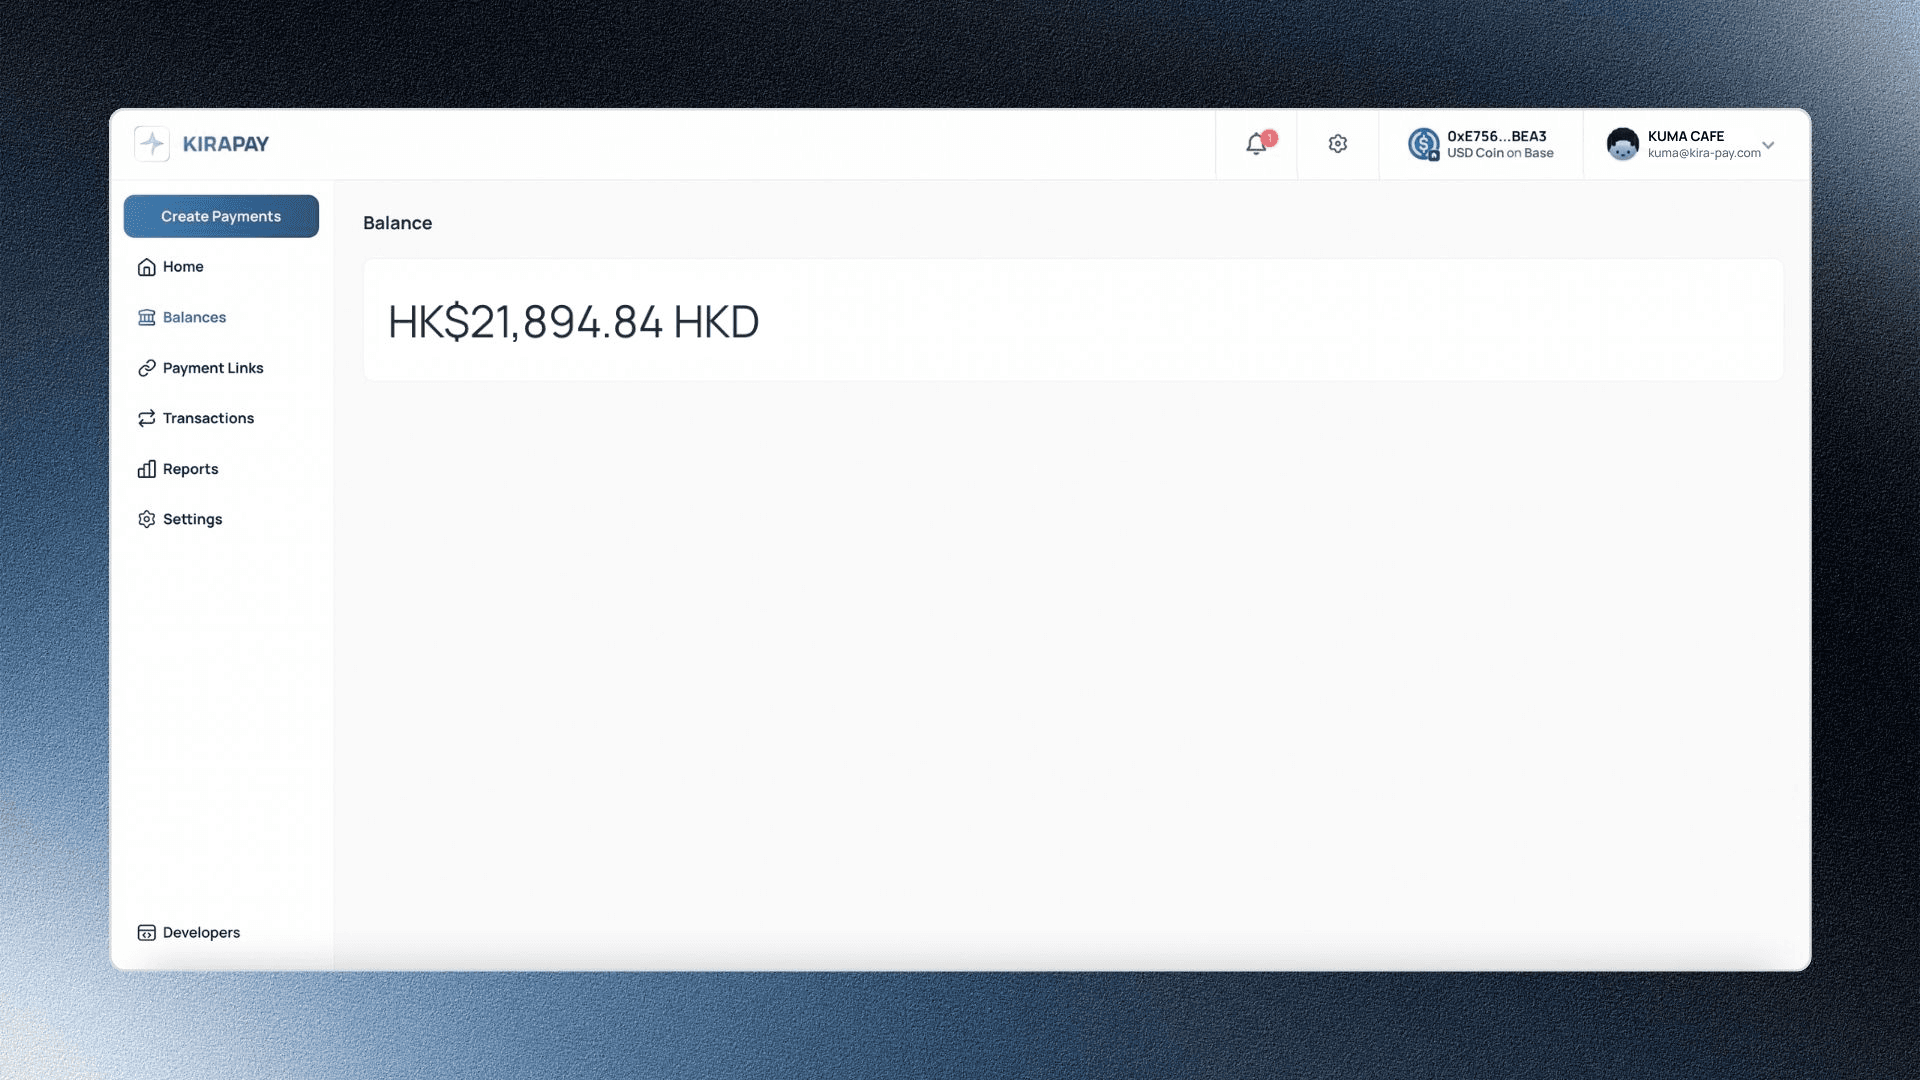
The Balances section shows your total current holdings displayed in your preferred fiat currency equivalent. As KIRAPAY is non-custodial, this reflects what has settled to your configured wallet — it is a real-time mirror of your on-chain balance, not a custodial account balance.
💡 Display Currency
The balance figure shown adapts to your preferred fiat currency setting. If your display currency is set to HKD, your holdings will show as HKD equivalent. If set to USD or EUR, it adjusts accordingly.
Changing Your Display Currency
If you want to view your balance in a different currency:
Go to Settings
Scroll down to Preferences
Under Display fiat currency, select your preferred currency — USD, HKD, EUR, and more are available
All balance and volume figures across the dashboard update instantly to reflect your selection
3. Payment Links
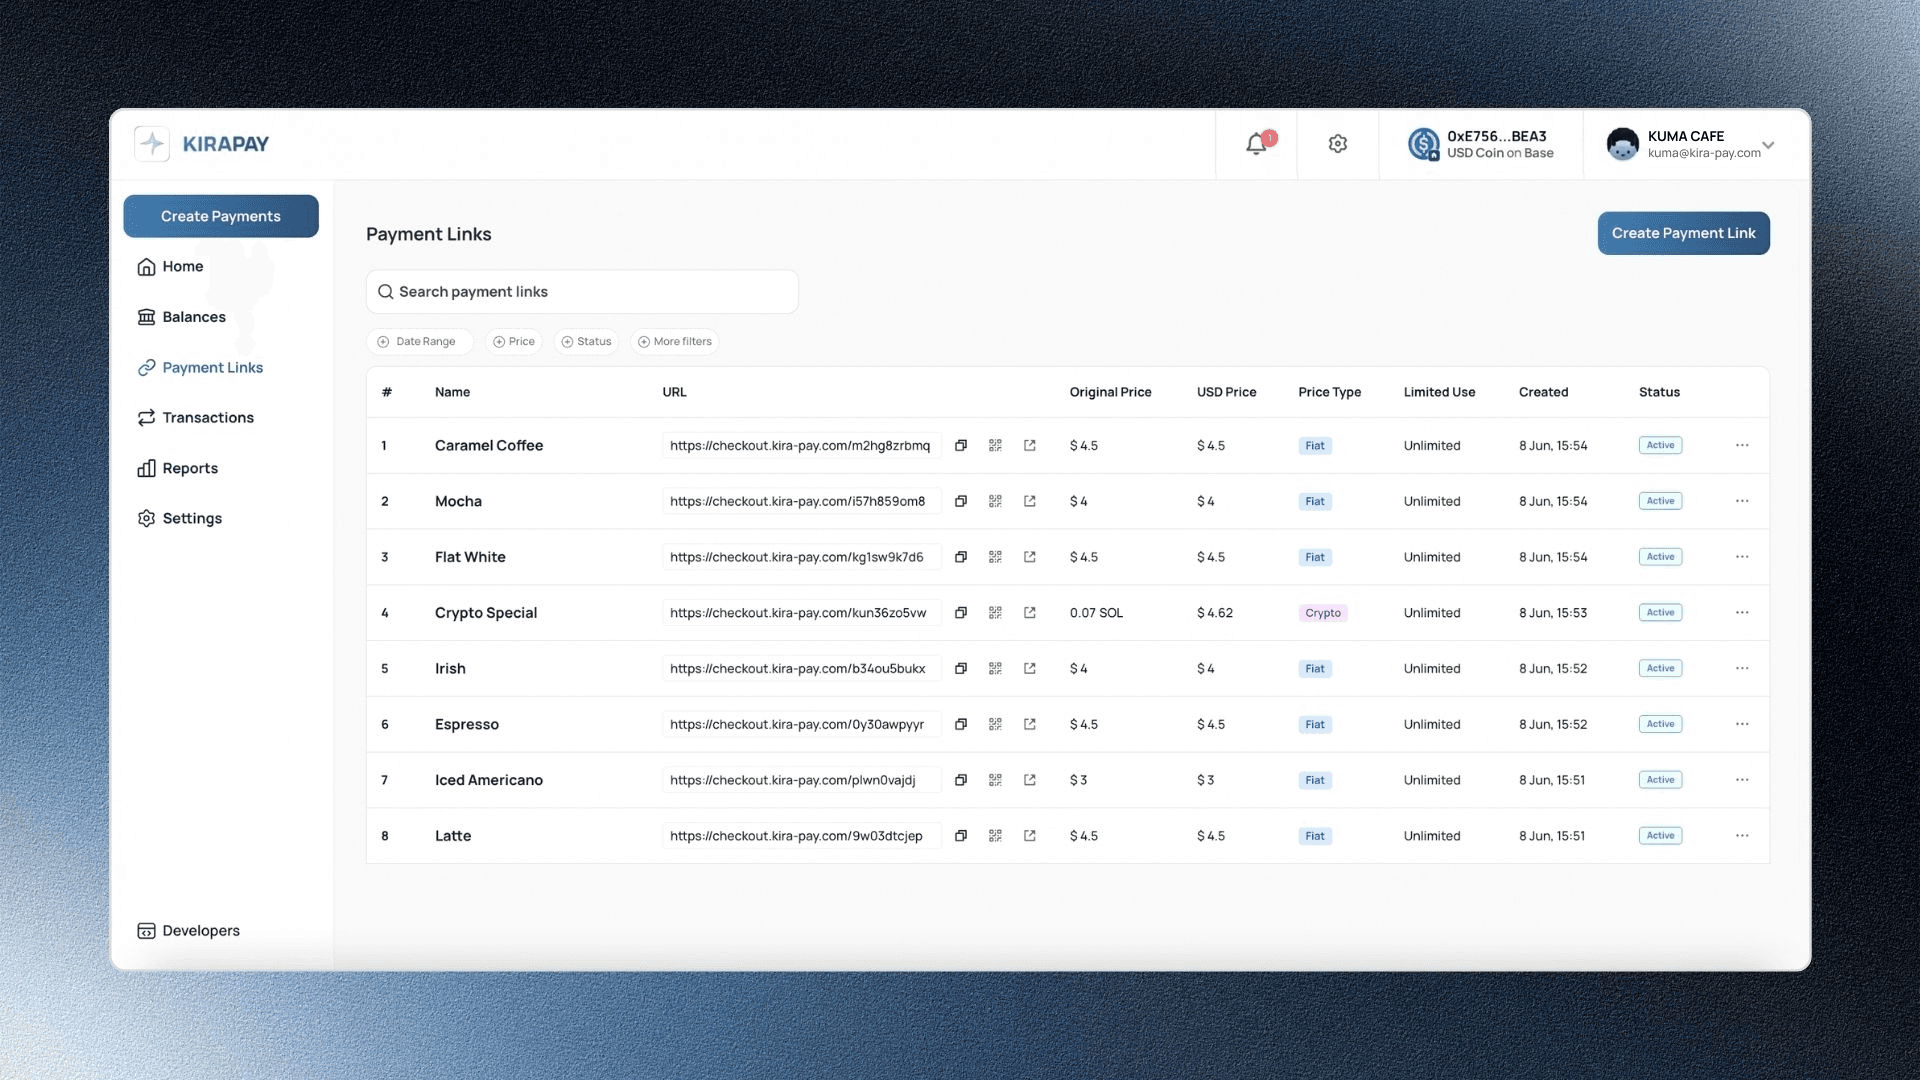
The Payment Links page lists every payment link you have created, with its name, shareable URL, original price, USD price, and price type. From here you can create new links, copy URLs, generate QR codes, and open links to preview the customer checkout experience.
Search & Filters
Filter | What It Does |
|---|---|
Search | Find a link by name or keyword |
Date Range | Filter by creation date |
Price | Filter by payment amount |
Status | Filter by Active or inactive |
More Filters → Currency | Filter by original price currency — USD, EUR, JPY, GBP, AUD, CAD, and more |
Payment Link Table
Column | What It Shows |
|---|---|
# | Sequential link number |
Name | Label you gave the link |
URL | Shareable checkout link — three action buttons included (see below) |
Original Price | Price in the currency set when creating the link |
Display Price | Equivalent converted to your preferred display currency — set in Settings → Preferences |
Price Type | Fiat — customer pays the crypto equivalent at the live checkout rate |
Limited Use | One-time or Unlimited — see note below |
Created | Date and time the link was created |
Status | Active links are live and accepting payments |
URL Action Buttons
Each link row has three quick-action buttons:
Button | What It Does |
|---|---|
Copy icon | Copies the checkout URL to your clipboard |
QR icon | Generates a scannable QR code for the link |
External link icon | Opens the live checkout page in a new tab |
⚠️ One-time vs Unlimited
A One-time link expires automatically after a single successful payment — it cannot be reused. Choose Unlimited if you need the same link to accept multiple payments (e.g. a product listing or subscription page).
📄 Pagination
Links are displayed 10 per page. Use the page controls at the bottom to navigate older links.
4. Transactions
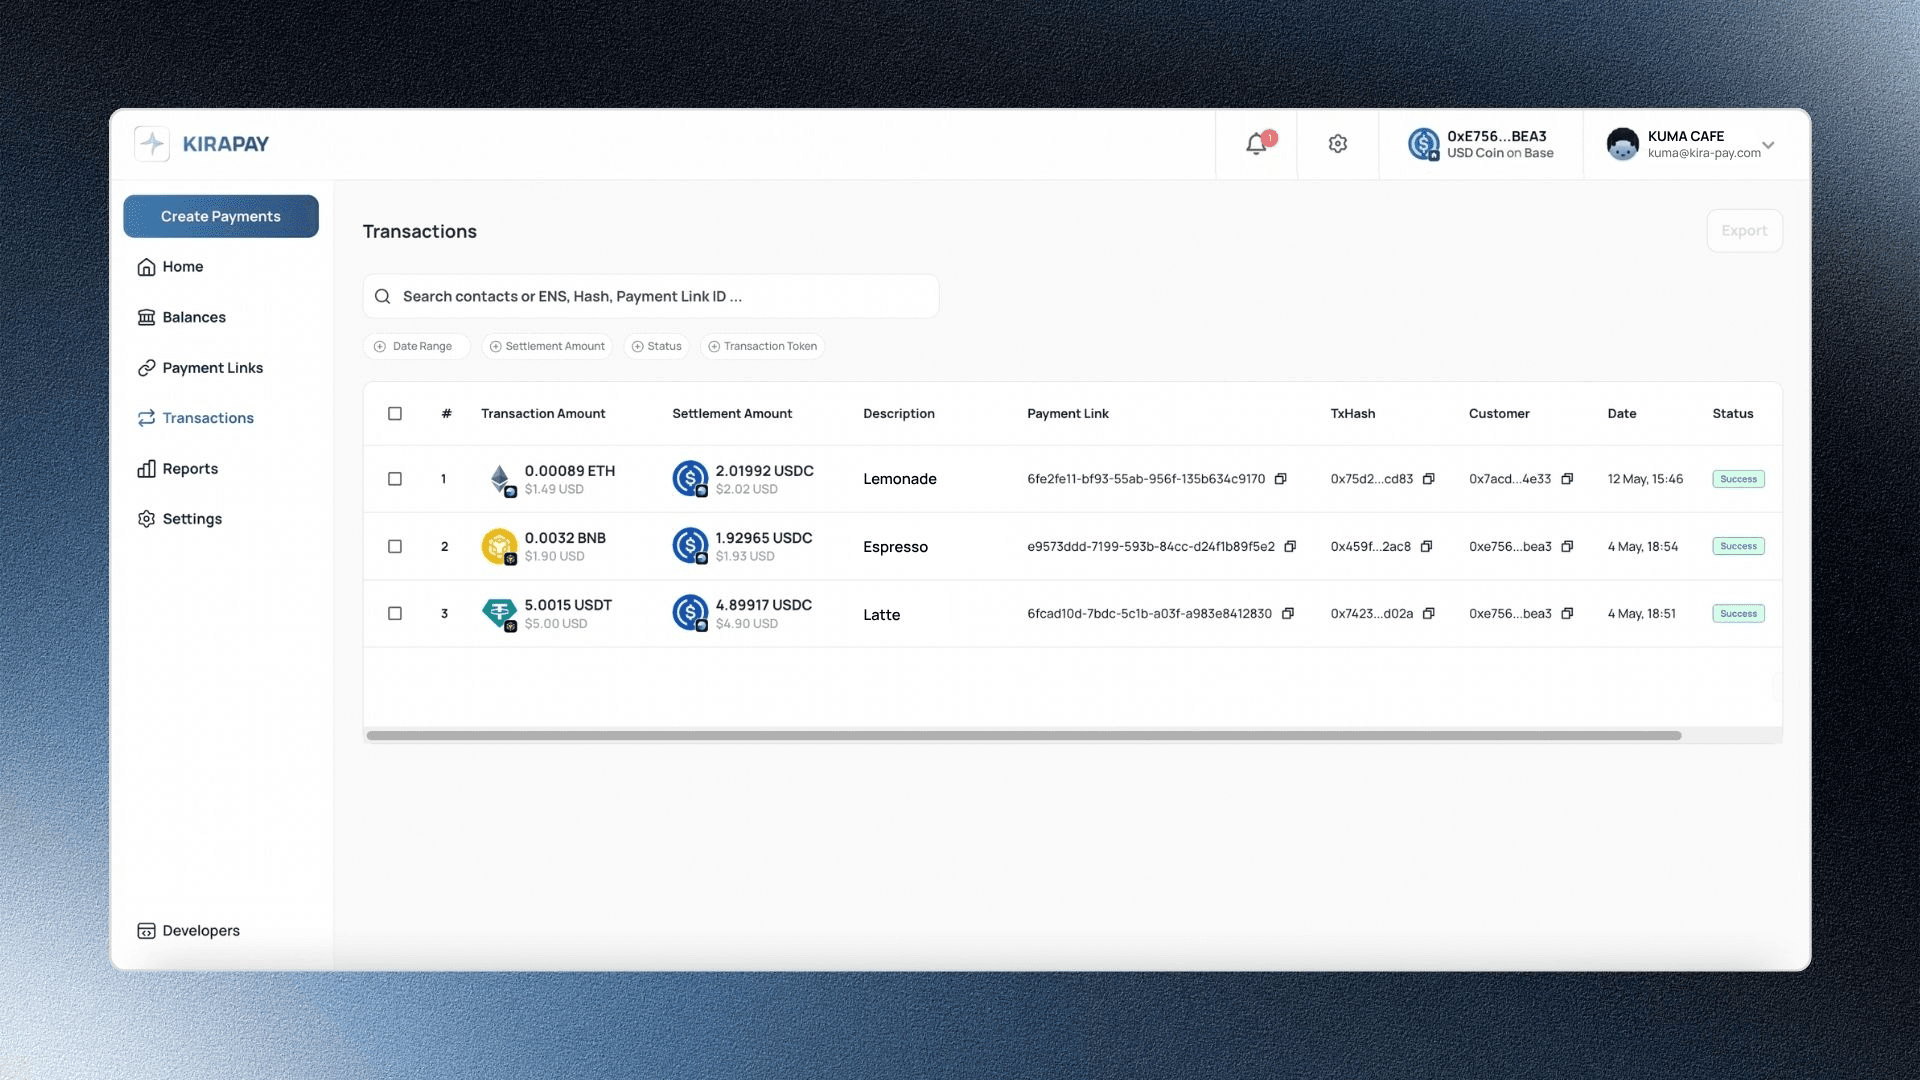
The Transactions page is your complete, searchable ledger of every payment ever received through KIRAPAY. It is the primary tool for reconciliation, customer support, and dispute resolution.
What You Can Do Here
Search by contact name, transaction hash, or Payment Link ID
Filter by Date Range, Settlement Amount, Status, or Transaction Token
View full transaction details — amount, settlement amount, description, payment link, TxHash, customer, date, and status
Export all transaction data as CSV for accounting and tax reporting
Transaction Table Columns
Column | What It Shows |
|---|---|
# | Sequential transaction number |
Transaction Amount | The amount the customer sent, in their chosen token |
Settlement Amount | What you received, in your configured settlement token |
Description | The label or reference set on the payment link |
Payment Link | Which payment link generated this transaction |
TxHash | The on-chain transaction hash — click to verify on a blockchain explorer |
Customer | Wallet address or ENS name of the paying customer |
Date | Timestamp of confirmation |
Status | Confirmed, Pending, or Failed |
✅ Verify Any Payment Independently
Every transaction row shows a TxHash — the unique on-chain identifier. Paste it into the relevant blockchain explorer (e.g. basescan.org for Base transactions) to verify the payment independently, without relying solely on the dashboard.
5. Reports
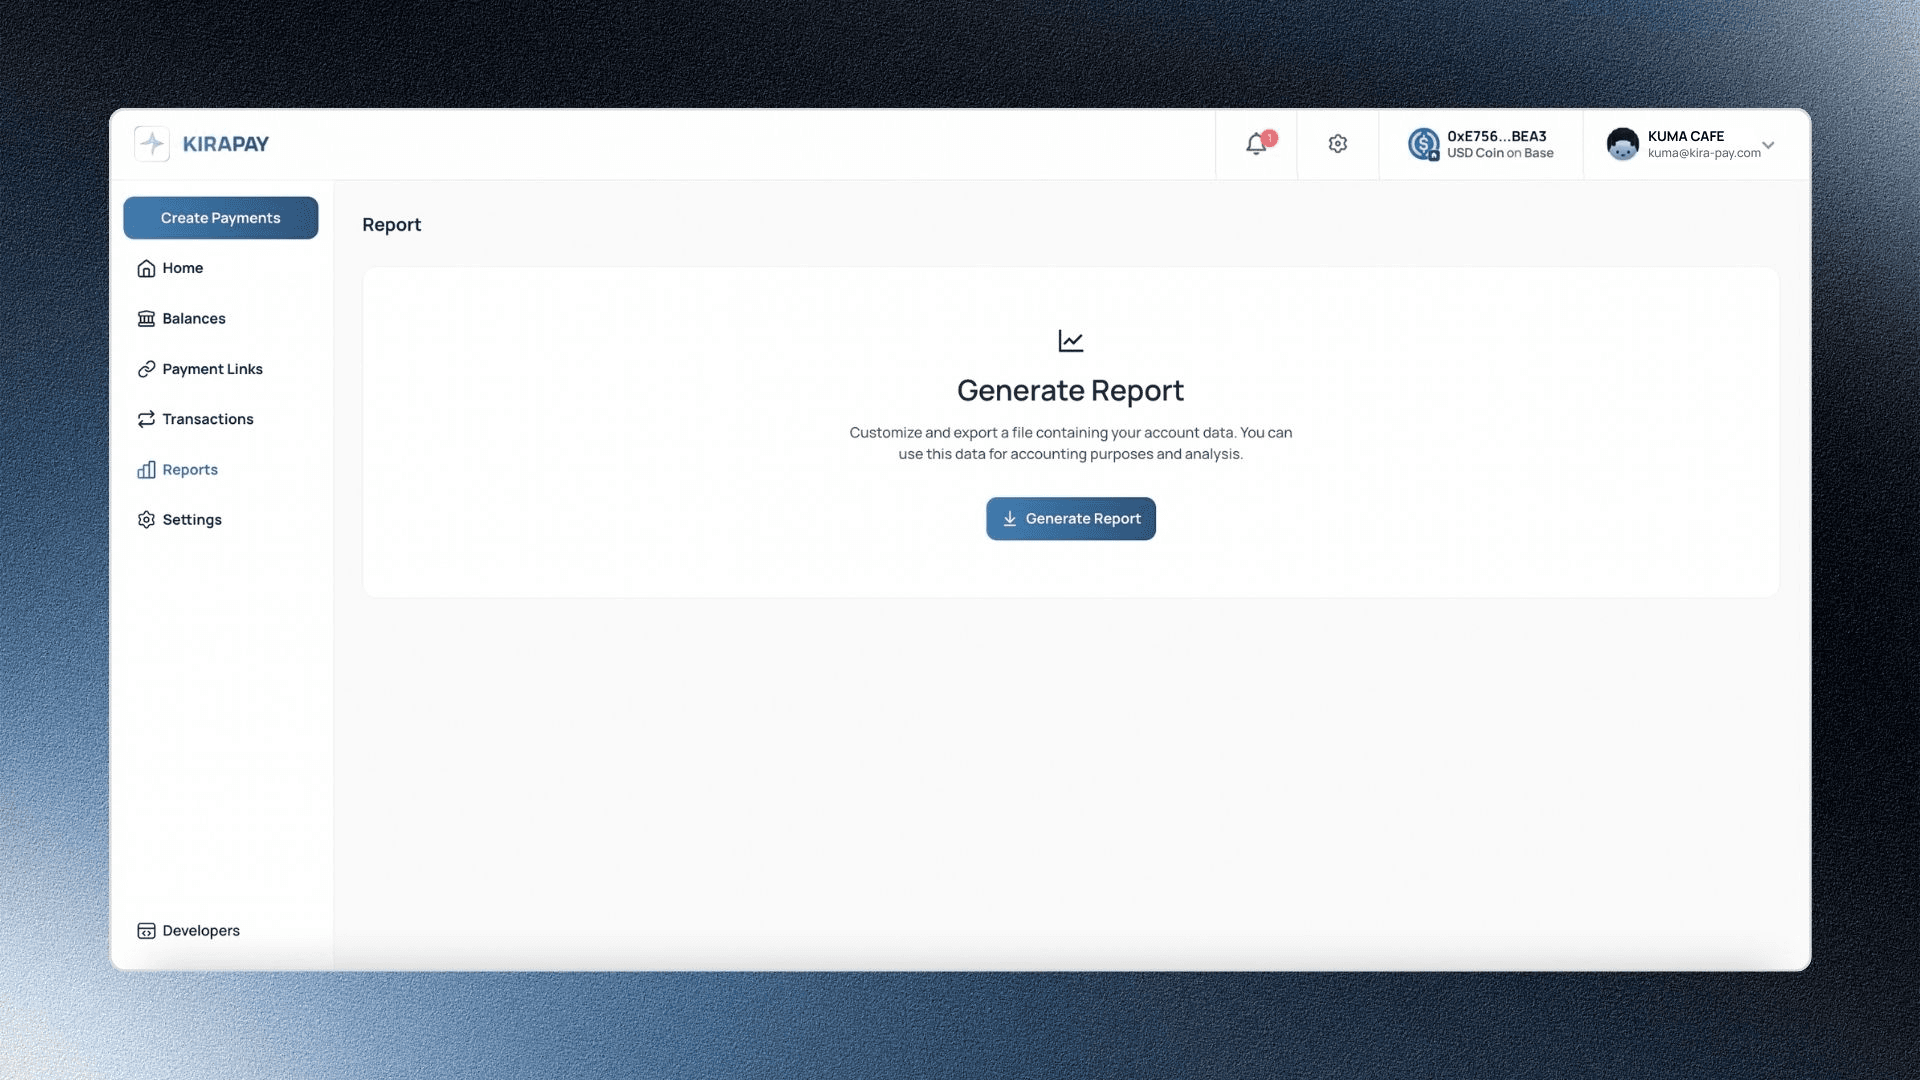
The Reports section provides exportable summaries of your transaction history, settlement activity, and revenue trends. Use reports for monthly bookkeeping, tax preparation, and financial audits. Reports can be filtered by date range and exported as CSV.
6. Settings
Settings is where you manage every aspect of your merchant account configuration. It is divided into four sections:

6.1 Settlement Configuration
Your active wallet address and settlement token are displayed here. Click Edit Settlement Configuration to update your receiving wallet or change your preferred settlement token and chain.
⚠️ Security Note
Changing your settlement address requires 2FA verification — this protects your account against payment redirection attacks.
6.2 API Keys
Your API key is displayed here, masked by default for security. Use it to integrate KIRAPAY's payment infrastructure into your app, website, or backend.
⚠️ Keep your API key private — treat it with the same care as a password. Never share it publicly or expose it in client-side code.
6.3 Business Information
Field | What It Does | Action |
|---|---|---|
Business name | Displayed on your checkout page and receipts | Change Business Name |
Logo | Appears next to your business name during the checkout flow for brand visibility | Upload Image |
Customer support email | The address customers can contact for payment-related issues. Displays "Not set" if not yet configured | Change Support Email |
💡 Tip
Setting your business name, logo, and support email gives customers a professional, branded checkout experience and builds trust at the point of payment.
6.4 Account Security
Setting | Description | Action |
|---|---|---|
Account Email | The email address used to log in to this account | Display only |
Change Password | Update your account login password | Change Password |
Passkeys | Sign in securely using your biometrics, device PIN, or hardware security key. Each passkey displays its date added. Remove any passkey using the red trash icon | Add Passkey |
Two-factor Authentication | Adds an extra layer of security to your account. 2FA is required when changing your settlement address. Can be enabled or disabled at any time | Disable 2FA |
KYC Verification | Verify your identity to unlock bank payouts, display a verified badge on your checkout page, and enhance overall account security | Verify Account |
⚠️ Recommended Security Setup
For maximum account protection, enable all three layers:
✅ Set a strong password
✅ Add a Passkey
✅ Enable Two-factor Authentication
6.5 Preferences
Setting | Description | Example |
|---|---|---|
Display fiat currency | Choose your preferred fiat currency — all crypto values across the dashboard display in this currency | HKD |
Time Zone | Set your local time zone — all transaction timestamps across the dashboard display in this zone | UTC+08:00 |
💡 Tip
Set your time zone correctly from the start — transaction timestamps across all pages, including Transactions and Reports, reflect this setting.